6 Tips for baking great bread
Making bread is a meditation of sorts, and mastering baking the perfect loaf is one of the most rewarding experiences in the kitchen. If you’re a new baker, it can be intimidating and depend on so many factors, which will determine whether your bread flourishes or flops. Luckily, TASTE is coming to the rescue with some key advice to take your baking to new heights.
1. Make time!
As with most things, time is your greatest resource when baking bread. Baking bread involves a lot of waiting, which is where the magic happens. Set aside enough time to mix and knead your dough, and extra time for proving it.
2. Use the right yeast for the job
It can be difficult to know which yeast is the right one, because there are enough options to potentially make the wrong choice. You're most likely to find four different kinds: instant dry yeast, fresh yeast (also known as compressed yeast), active dry yeast and sourdough. Yeast is yeast, and any one of these varieties will work, but they all have different properties and need to be treated as such. Instant dry yeast is most commonly used by home bakers because of its accessibility, affordability and convenience. It's added at the same time as the other dry ingredients and doesn't need to be bloomed in a warm liquid before using. It's sold in 10 g packets, which is the measure that most bread recipes will require. It consists of tan-coloured granules, which dissolve quickly when exposed to moisture.

ALSO READ: How to make a sourdough starter
Fresh yeast comes in firm but crumbly blocks, is light brown in colour and breaks apart easily when fresh, but takes on a soft, almost gooey texture when no longer fresh. It has to be dissolved in warm liquid before being added to the rest of your ingredients. It's popular for its potent and rapid rise and is widely used in sweet bakes such as doughnuts, because of its sweet fragrantly flavour. It has a shelf life of roughly two weeks when correctly stored before tufts of white mould develop on its surface. It can be stored in the freezer for up to a year if tightly wrapped in clingwrap.
Active dry yeast is partially dehydrated and needs to be bloomed in a warm liquid for 10–20 minutes before use. It's not as widely used as once was, and its moisture content reduces its shelf life significantly. It's heat sensitive and needs to be stored at a cool temperature, where it'll last for a few months. To activate it, dissolve the yeast in warm water or milk – once it rises and froths, it's ready to incorporate into the rest of the ingredients.
3. Knead it!
Kneading bread dough is what strengthens the gluten strands and allows the protein molecules in the flour to form. Gluten is what helps the mixture create gas and elasticity, which helps it rise and build texture. When the dough has been adequately kneaded and the gluten has formed properly, it will increase in volume and soften. “For white bread, knead the dough until it feels like an earlobe” says chef and cookbook author Karen Dudley. To test whether you've kneaded your dough enough, take a piece of dough and slowly stretch it out – if it's ready, it'll stretch out to about 6–10 cm. If kneading isn't your thing (or if you physically can't knead), there are many no-knead bread recipes, like this soda bread.
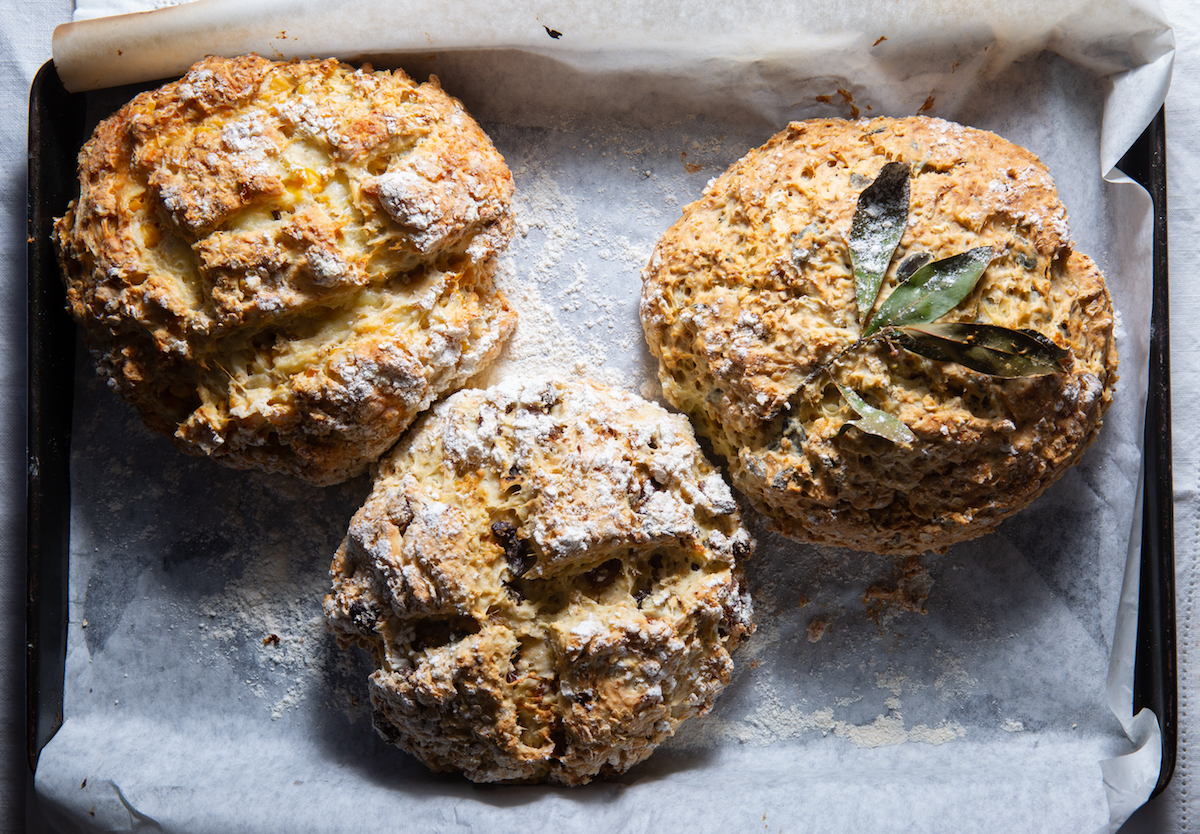
Get the recipe for soda bread here.
4. Temperature matters
Bread dough thrives at the right temperature. When you combine the dry ingredients with wet, the water you use needs to be lukewarm, to activate the yeast. Chef Adam Robinson of the Glenwood Bakery says: “When first mixing your dough, aim for a temperature of 24°C, then put them in the veggie drawer of your fridge overnight to slow down the yeast so that the bacteria can have a party! A probe thermometer is a cheap and useful tool.” Remember to preheat your oven, too. “For a crisp crust, a spray of water in the hot oven or a bowl of water in the oven will create steam, which helps slow crust formation while your dough finishes rising.
Then, towards the end of your baking time, open up the oven to release the steam and finish baking to dry out and crisp your bread’s crust.”
5. Just add salt
No bread is complete without salt. Not just for the flavour – which is also important – but because salt helps to give your bread structure. Taste your dough to make sure you've added an adequate amount. Of course, as with all things, moderation is key. Too much salt, and you could kill your yeast and the bacteria responsible for your dough's rise.
6 Prove yourself
Proving your dough is a step that can't be skipped. This is the final wait once you've shaped it. Don't leave the dough to prove for too long, as this can limit the rise of your bread, and underproving will result in a dense, heavy loaf. One hour is normally the magic number, but all recipes differ. Read yours carefully to get the timing just right. To check whether your dough has proved sufficiently, poke the dough with your finger. The indentation should spring back up slowly.


Comments