How to braid round challah for Rosh Hashanah
Different from the three- or six-strand straight challah bread served the rest of the year, the rounded challah served at Rosh Hashanah represents infinite blessings for the coming year. Here’s how to braid it. By Jess Spiro
Why is the challah served at Rosh Hashanah round?
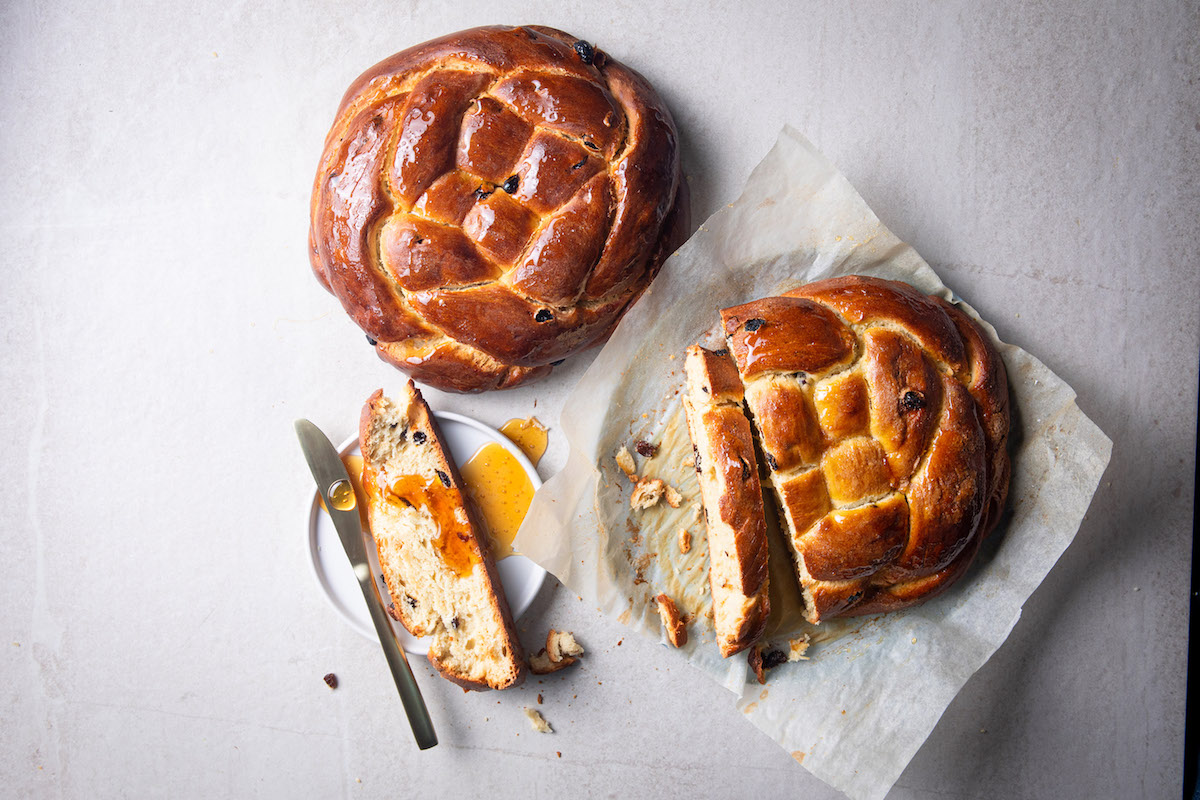
Depending on who you ask, there are a number of different views on why the challah served at Rosh Hashanah is round. The most common idea is that the infinite braiding, with no clear beginning or end, represents a year full of endless good blessings and fortune. Another is that the round shape resembles the crown of God, or crowning glory for the start of the year. Usually, this challah is either made with raisins or brushed with honey to symbolise a sweet new year, but this is optional if you prefer to keep it plain.
 Get the recipe for round challah for Rosh Hashanah here.
How to braid round challah for Rosh Hashanah
As with most techniques, it’s easier to explain using images. Below we’ve explained how to make a round challah for Rosh Hashanah.
Method
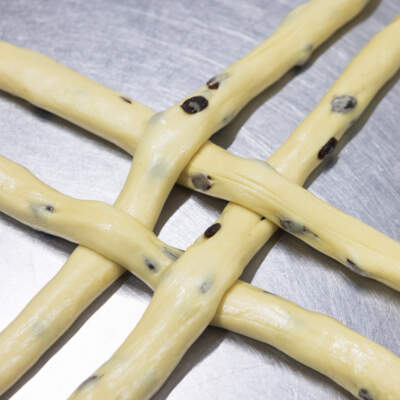
Start with a hash (#) shape with two dough strips running horizontally and two running vertically on top. Take one top piece and weave it over and under the horizontal bottom pieces. Take the other top piece and weave it under and over the bottom pieces – the inverse of what the one on the left is. The result should look like a plus sign with no spaces between the strands. There will be two strands pointing in each direction, each strand will go over and under another piece.
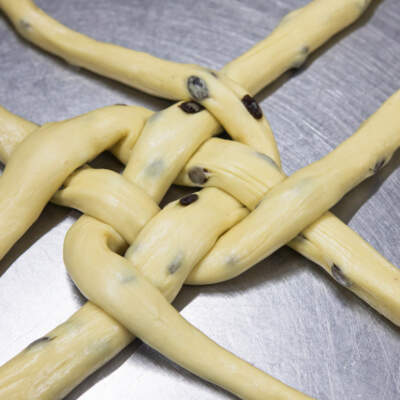
Start at the top, taking a strand on the left and crossing it over the strand to its right. Take that strand (the one you just folded the first one over) and cross that over the one to the right. Do the same with the remaining two strands until you’ve got two strands pointing in each direction again, but with one strand slightly shorter than the other.
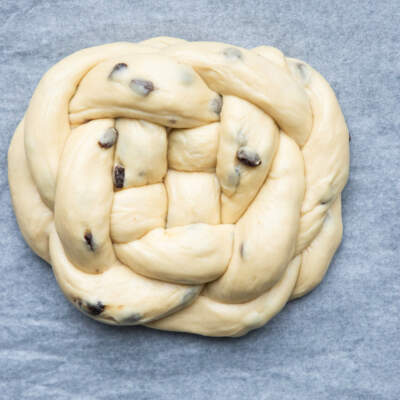
Then, repeat in the opposite direction, starting with the vertical strand on the right, crossing it over the strand to the left. Repeat until you run out of dough, trimming excess if you need to, or just tucking it underneath.


Comments