Making jam 101
Inspired by her grandmothers’ love of preserving, TASTE commercial content producer, Lesego Madisa, shares her tips and tricks to making your own home-made jams. It’s easier than you think and the rewards are absolutely worth it. Get your jars and fruit ready, the masterclass has begun.
When I was growing up in the early 90s and noughties, my uncle and his best friend owned a fruit stall. It was across the road from the SARS offices in the Pretoria CBD and they were pretty good at turning a profit. But everyone knows that produce doesn’t keep for very long, so whatever was left over at the end of the day was my family’s to keep. I’d watch my grandmother come up with creative ways to preserve fruit and veg and thus, my love for preserving was born.
Fast-forward to 26 years later – whenever I have a punnet of peaches or a bag of apples I can’t help but see potential for jams, syrup, pickles and curds. The books, blogs and experts list a ton of special equipment and exotic fruits, but I’m here to tell you that all those things aren’t necessary. All you need is fruit, sugar, a large pot, sterilised jars and a little patience. Here’s how to get started:
Stick to seasonal fruit
It’s best to preserve fruit at its peak. That way you’re less likely to add heaps of sugar and the natural sweetness of the fruit will shine.
Sterilise your jars
The last thing you want after making your jam is for it to spoil. Your jars must be sterilised before you start the preserving process. Prepare a water bath in a pot and place the empty jars in the water sideways so that they fill up before turning them right-side up. Add the lids and leave on the stove over a low heat. You can also add a dash of vinegar to keep things sterile.
Using a clean set of tongs, remove the jars from the water bath making sure to pour out the water inside the jars. Set aside your clean jars on a clean tea towel.
The pot does matter
When making jams and marmalades, the pot you use can make or break your recipe. The key to cooking down fruit is to do it as quickly as possible so the ingredients taste fresh and the sugars don’t caramelise or burn. Use a heavy-based pot to avoid scorching, and make sure to not fill it to the brim with fruit and sugar because the jam will likely expand as it cooks. If it’s too full, it’ll overflow and, trust me, the last thing you want is to scrub burnt sugar off your stovetop.
The canning process
Once your recipe is complete, remove the pot from the heat and carefully fill the jars with your jam. Make sure every utensil you use is clean and sterilised. I usually spray my utensils with hot water mixed with vinegar before getting started. Leave about an inch of space at the top – when you place the jars back into the hot water bath, the contents of your jar will expand so you want to make sure there’s ample room and to cause a vacuum seal inside the jar.
You have to jar the jam while it’s still warm; if it cools down place it back on the heat to warm it up again. Carefully wipe the rim of the jar if there’s any mess – hot water and a clean tea towel will do. Screw the jars closed until you’re met with some resistance. You don’t want to seal it tight – the water bath will do that for you. This step is to ensure that when placing the filled jars back inside your water bath, air escapes (you’ll see the bubbles coming out of the lids) and a vacuum seal is created that will prolong the shelf life of the jam.
Almost done…
Once you’ve filled and sealed your jars, carefully place them in a clean pot filled with boiling water. The water should cover the lids of the jars to maintain good circulation and even temperature. Double-check that the jars are upright and if a jar does tip over, use a long wooden spoon to set it back upright. Once the water reaches the boil, carefully remove the jars right away. It will be hard to resist tipping the water off the tops of the lids, but try to keep them upright as you remove them. I usually put on gloves for this process but if you have a steady hand, a pair of tongs will do the trick too. Tighten any loose lids.
A little tip from grandma:
Fun fact: both my grandmothers are big on preserving! My father’s mom had a small business selling canned fruit. Her useful tip is to wrap the hot jars in a warm towel or blanket and leave them overnight to cool. The blanket helps to cool down the jam evenly and prevent any explosions, which can happen if the jars cool down rapidly.
Once sealed and cooled, you can keep your home-made preserves in a cool, dark, dry place for up to a year. Your kitchen cupboard will do just fine.
The best part
Now that you have the basics, here are some great recipes to get you started:
1. Blood orange marmalade
Capture the bright citrus flavour and colour of this gorgeous fruit! Blood oranges are in season at the peak of winter, the cold temperatures are responsible for their bright crimson colour. Since they're only available for a limited time, preserving blood oranges is the best way to eat them all year round. Spoon the marmalade over pavlova or just spread on toast.
 Get the recipe for blood orange marmalade here.
2. Stovetop spiced strawberry jam
Nowadays strawberries are on shelf throughout the year, but in South Africa they're at their peak between August and December. This spiced strawberry jam is flavoured with warm spices of cloves, star anise, cinnamon and cardamom. These flavours lend themselves well to the winter months. This jam will be great in a bread-and-butter pudding or warm scones when guests come knocking. 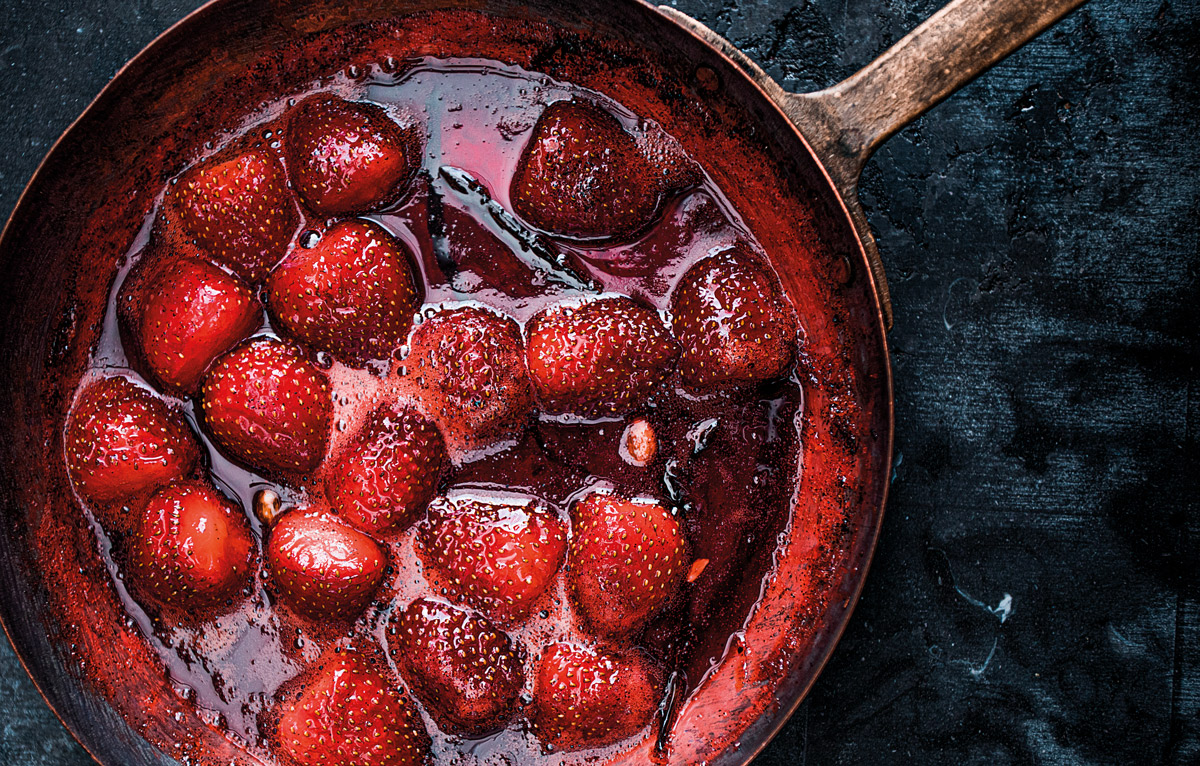 Get the recipe for stovetop spiced strawberry jam here.
3. Tomato tamarind jam
If you doubt that tomatoes are fruit, Khanya's tomato tamarind jam will convince you otherwise. I've made this recipe countless times and I can confirm that it's worth it. Spread it on bread and top with sharp cheese to make the ultimate grilled cheese toastie.
 Get the recipe for tomato tamarind jam here.
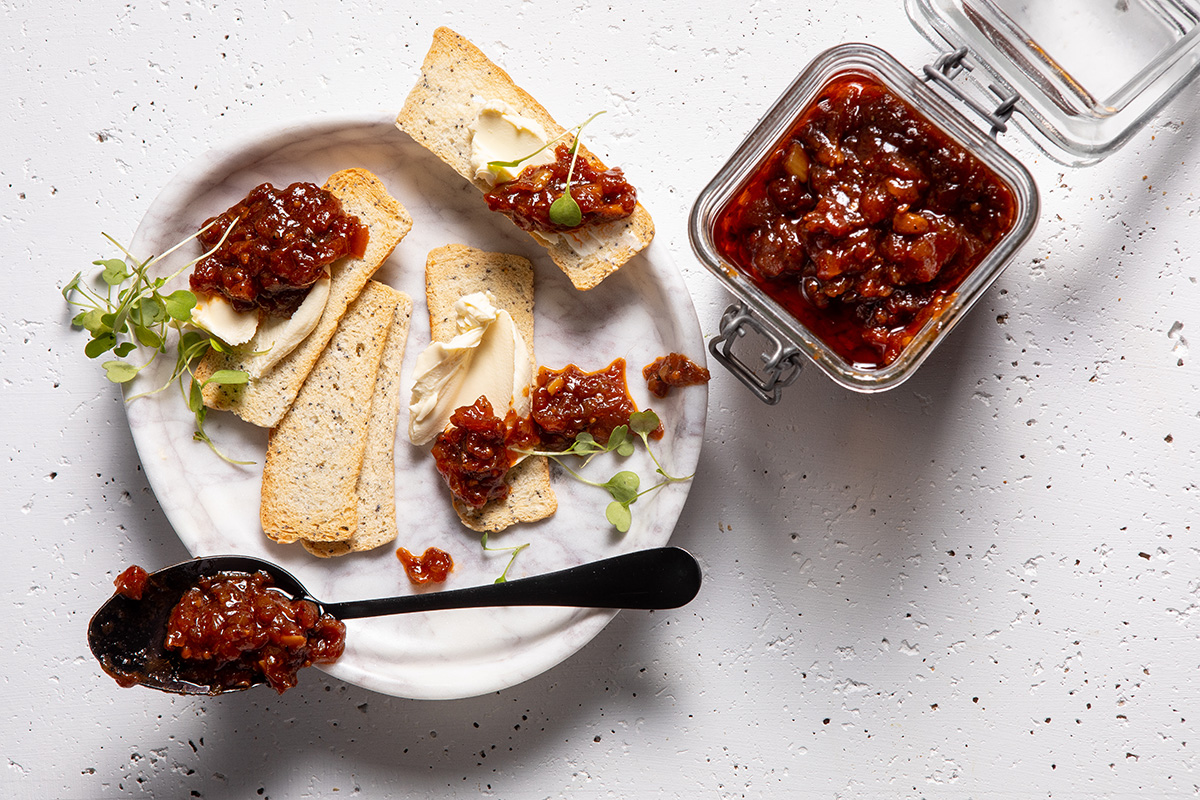
4. Biltong jam
This biltong jam deserves a spot on your cheeseboard. Biltong is an unlikely ingredient to turn into a jam, but think of caramelised onion chutney – this is similar. The salty-sweet flavour makes it an excellent jam to use in savoury dishes. Add it to burgers, boerie rolls, or be adventurous and add a spoonful to savoury oats.  Get the recipe for biltong jam here.
5. Grilled raspberry-and-chia tray jam
Not all jams are made on the stovetop. The oven is a great way to deepen the flavour of the fruit as it slowly caramelises the sugars. Doing it on the stovetop may result in burning the sugars, but this way you have more control. The addition of chia seeds adds some texture to the jam. If the other recipes in this round seem too intimidating, this three-ingredient recipe is the perfect staring point. 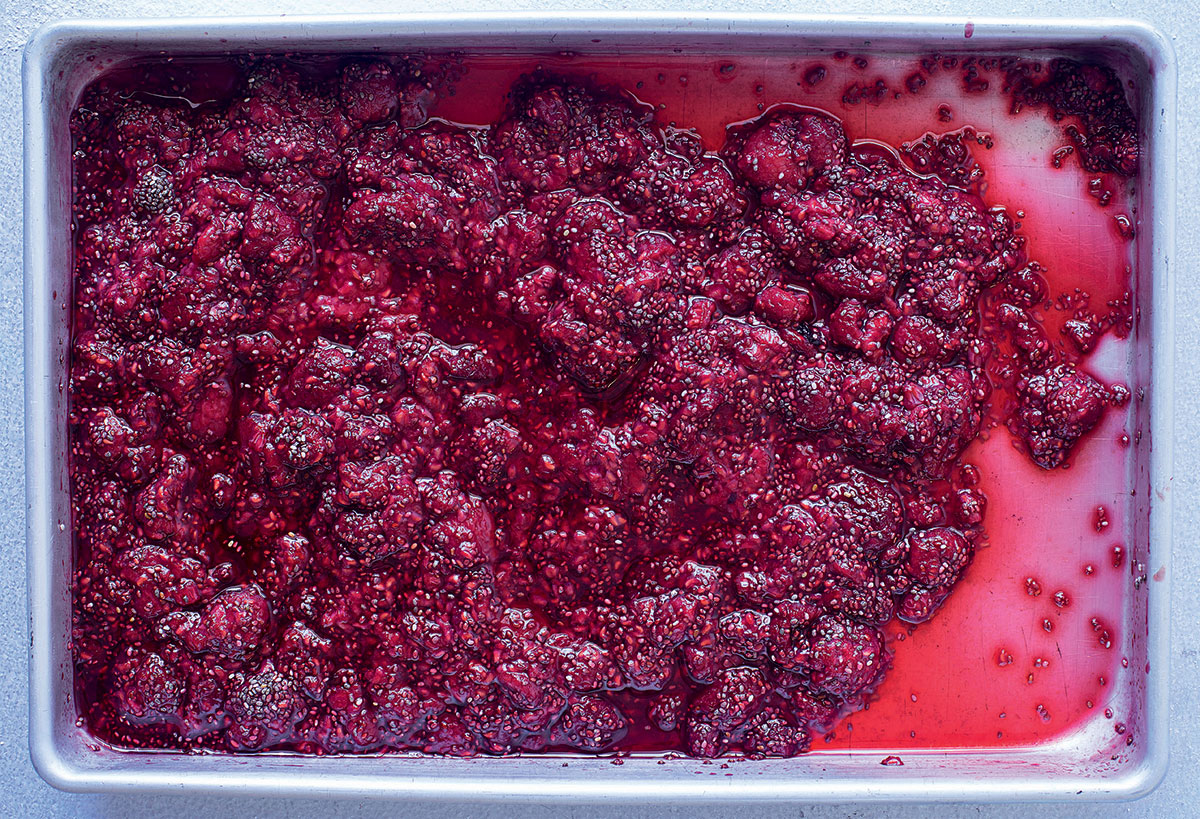 Get the recipe for grilled raspberry-and-chia tray jam here.
Want more jam recipes? Browse our collection of jams and preserves here.


Comments