I got an air-fryer and it did not change my life
For years, online editor, Annzra Denita Naidoo was resistant to the air fryer phenomenon. When she finally caved and got one, she put it through its paces to see if the hype is real. It wasn’t, here’s why.
I shocked everyone I knew the day I declared I was buying an air-fryer. For years, I’d scoff when people talked about how amazing they are. What’s so great? It’s just a countertop oven! Perhaps my dislike came from the 20% hipster that still remains in me from my varsity days (urgh, they’re so mainstream 🙄). It could be the hundreds of comments on TASTE’s social media asking “can I make this in the air-fryer” that plague my existence. Whatever the reason, I was firmly set on never having one in my kitchen.
Of all the testimonials praising air-fryers, there was only one that swayed me. I saw a reel demonstrating how air-fryers use much less energy than ovens. In this economy, with the constant electricity tariff hikes (I'm looking at you 18% hike coming in April 2023), this video cracked my anti-air fryer resolve. I'd just moved into my own place (paying bills solo is no joke), and finally had the counter space to accommodate one. It made financial sense, so I caved. I waited for Black Friday because there was no way I was going to pay full price for an appliance I technically hated. I bit my tongue when people made fun of me for caving and told me how much better my life would be. I was going to be the judge of that.
ALSO READ: The nostalgic, but slightly terrifying, task of setting up my first spice cupboard
The first time
To be clear, I'm not anti-air fryer because I hadn’t seen what it can do. My parents have been team air-fryer since 2017. Colleagues who own one gush about it. I see amazing air-fryer recipes on social media all the time (which I successfully recreated in my oven). I just can't get over how people talk about this appliance as if it were a miracle. So I had high expectations and slight hope that I would be proved wrong. I'd invested in one now – I didn't want my purchase to be a waste.
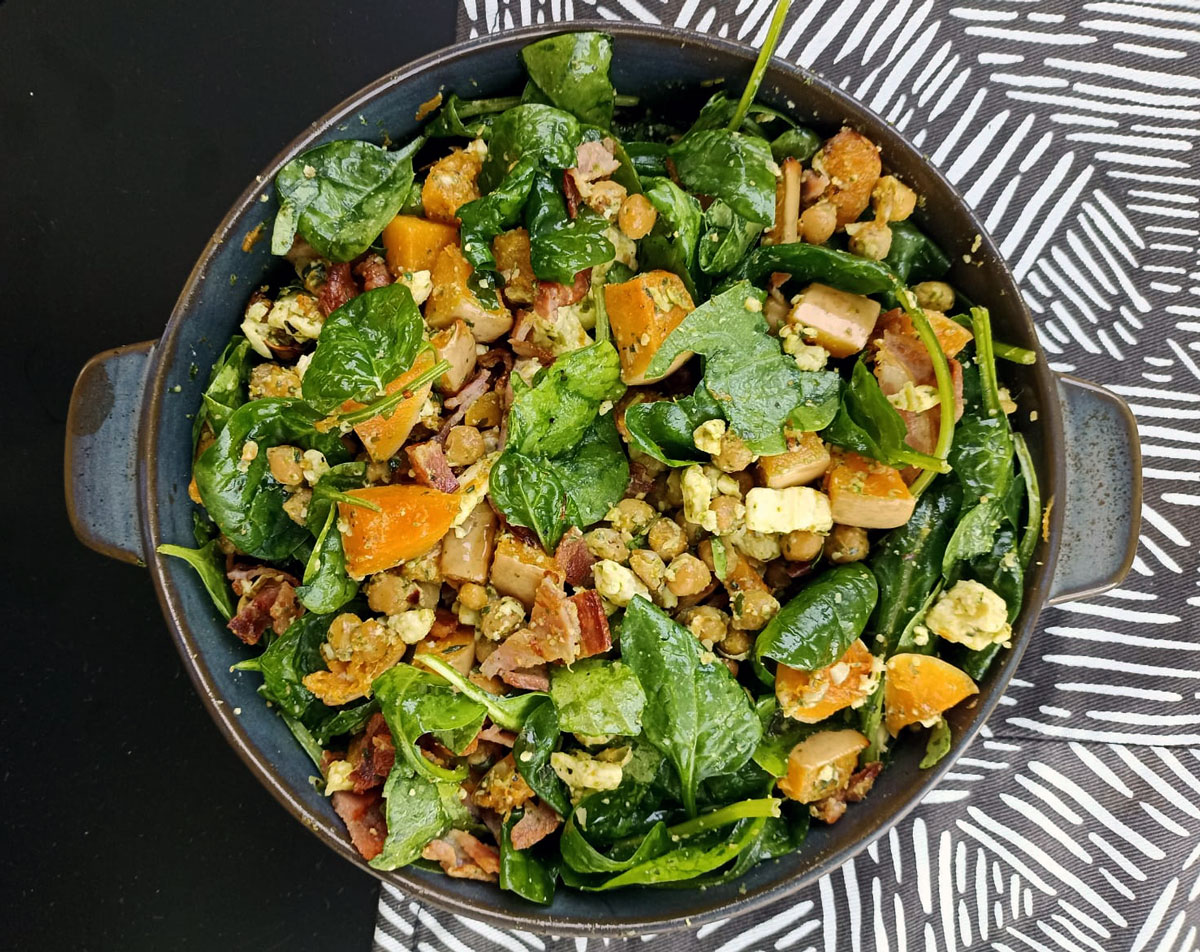
The first thing I made was a butternut-and-chickpea salad. It’s one of my go-to recipes because it’s easy, delicious and quick to make. Not with the air-fryer though… I spent about an hour looking up the optimal times to air-fry butternut, chickpeas and bacon. I read blogs, and appliance websites and finally found a guide outlining cooking times for various ingredients for my specific model. This was tedious. Especially since the recommendations were off and I ended up with unevenly roasted butternut (yes, my butternut was cut to roughly the same size and was a single layer on the tray). This ruined my normally awesome salad and I was upset.
It took way longer to make than usual because I had to roast all the ingredients separately. SO annoying. Before you come for me, I know I could have made the dish in the oven where I roast everything once, but I was on a mission to test my air-fryer properly.
ALSO READ: Yes, I love my air-fryer (and I’m not afraid to admit it!)
I also hated how loud it was. This probably won't bother you if you live in a big house where you can escape the noise (and heat), but I live in a tiny apartment. There's also more clean up needed, compared to an oven.
All this made for a disappointing first experience. I don’t want to conduct research worthy of a thesis before doing something as simple as roasting vegetables. And I don’t have the patience for the trial-and-error approach, because I have to eat all of the errors.
Air-fryer successes and fails
After my first experience, I avoided making things without explicit air-fryer instructions. Thank goodness Woolies has those on many of their products – I don’t know how people managed before. Social media recipes were my best bet. There are hundreds of interesting recipes done in the air-fryer with exact instructions and visual references.
NEED AIR FRYER RECIPES? Check out our recipe guide.
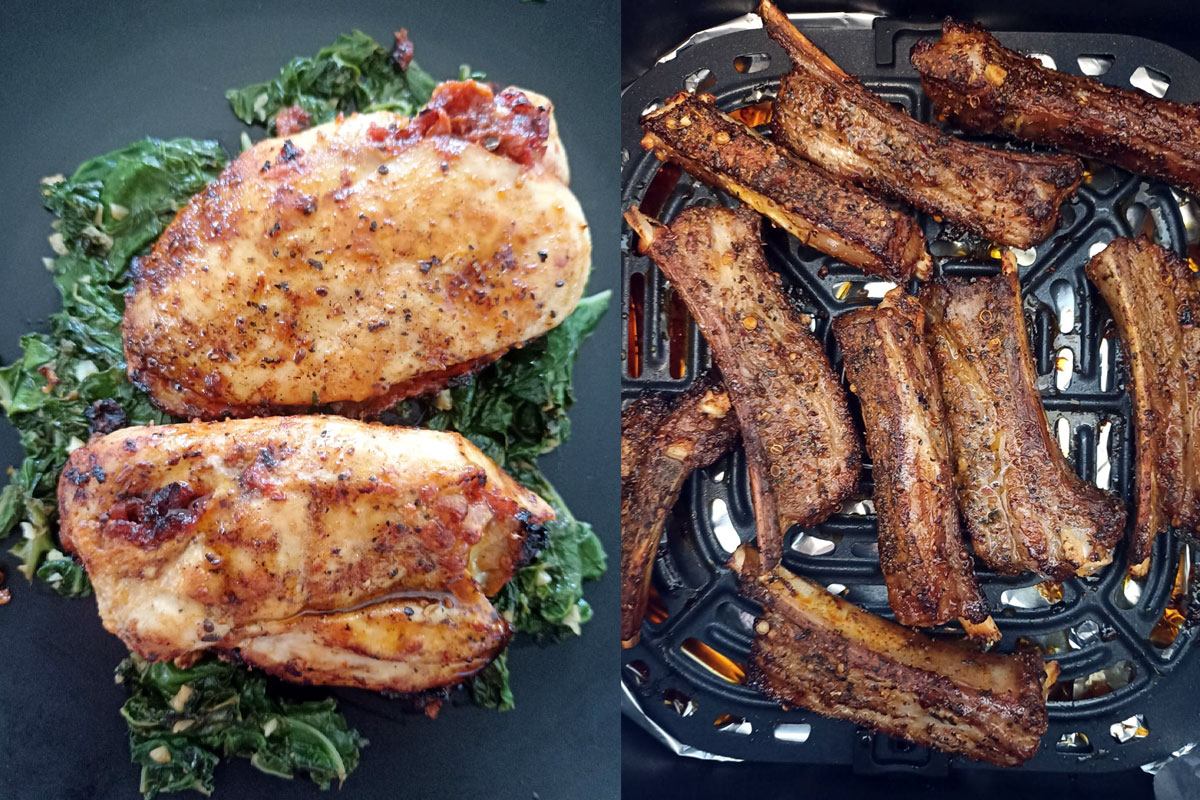
The first social media recipe I tried was chicken breasts, stuffed with red pesto, mozzarella and salami. Initially, I thought the chicken was dry, because of that characteristic air-fryer crisp. But inside it was actually succulent and delicious. I have also successfully made sausages, meatballs and ribs – but they take roughly the same time as they would in the oven (which is much quieter, btw).
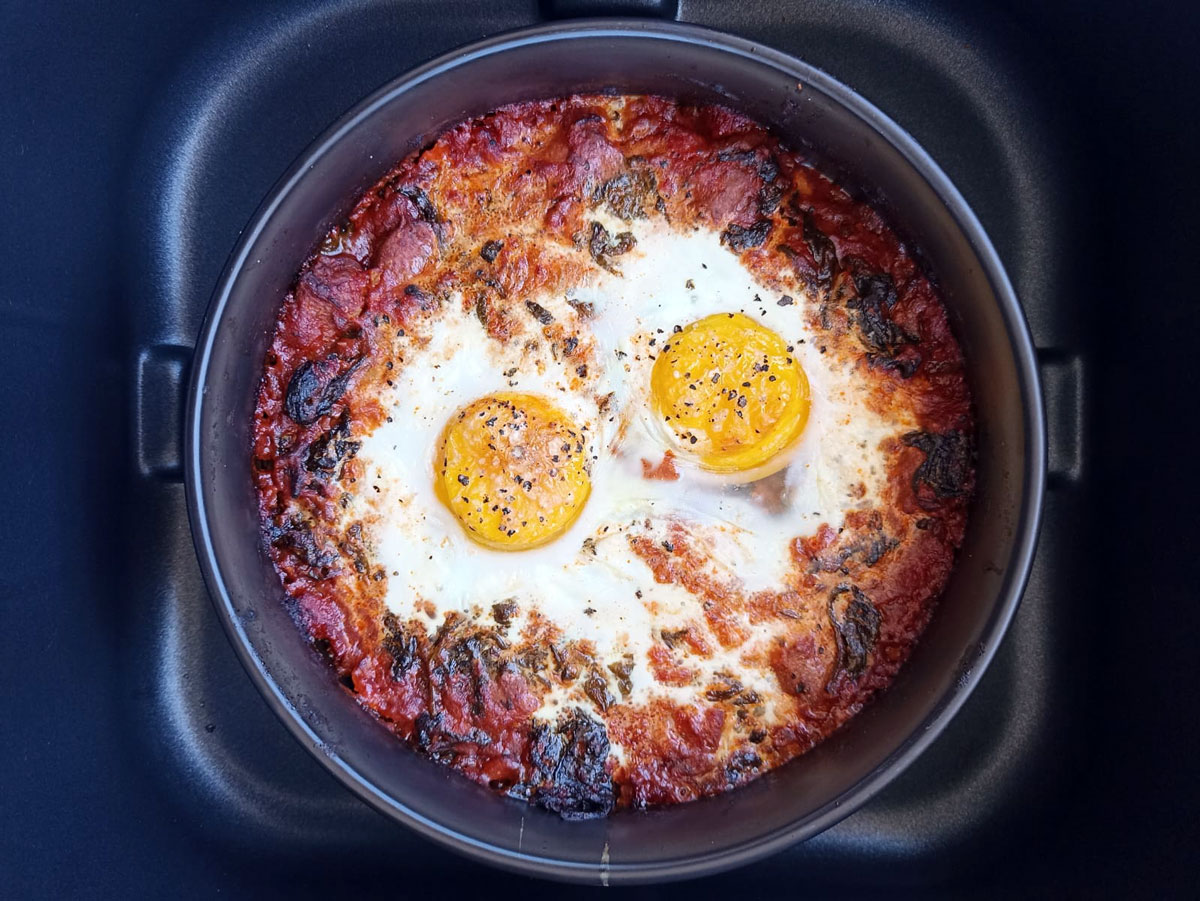
All these successes gave me a false sense of confidence. This resulted in the worst eggs I've ever made in my life. I had leftover tomato chutney and decided to make a cheat’s shakshuka in the air-fryer. At this point, I had seen many videos of people doing eggs in the air-fryer, and I did the dreaded research on cooking times. But I got half crispy, half raw eggs. I had to finish the dish in the microwave to avoid getting salmonella and, let me tell you, twice-cooked eggs are not a vibe.
ALSO READ: How making tomato chutney for a year taught me to cook
Yes, air-fryer baking is possible. It’s just not for me
Determined to test the air-fryer fully I had to bake something in it, despite not being a baker. I consulted my team and we agreed I'd try Louisa Holst’s air-fryer milk tart. We were fascinated by the idea of making this South African classic in the air-fryer. I should have known this was too higher grade for me. I’d never made milk tart before.
The pastry shrank. I put the filling into the crust too soon, making it doughy. I didn’t wait long enough for the filling to set. The milk tart was not inedible (the filling was actually really tasty), but it was an utter failure, and I can’t blame the air-fryer for this. I’m sure more experienced people will have better results. The jam turnovers I made with the excess pastry were good though, so it wasn't a total loss.
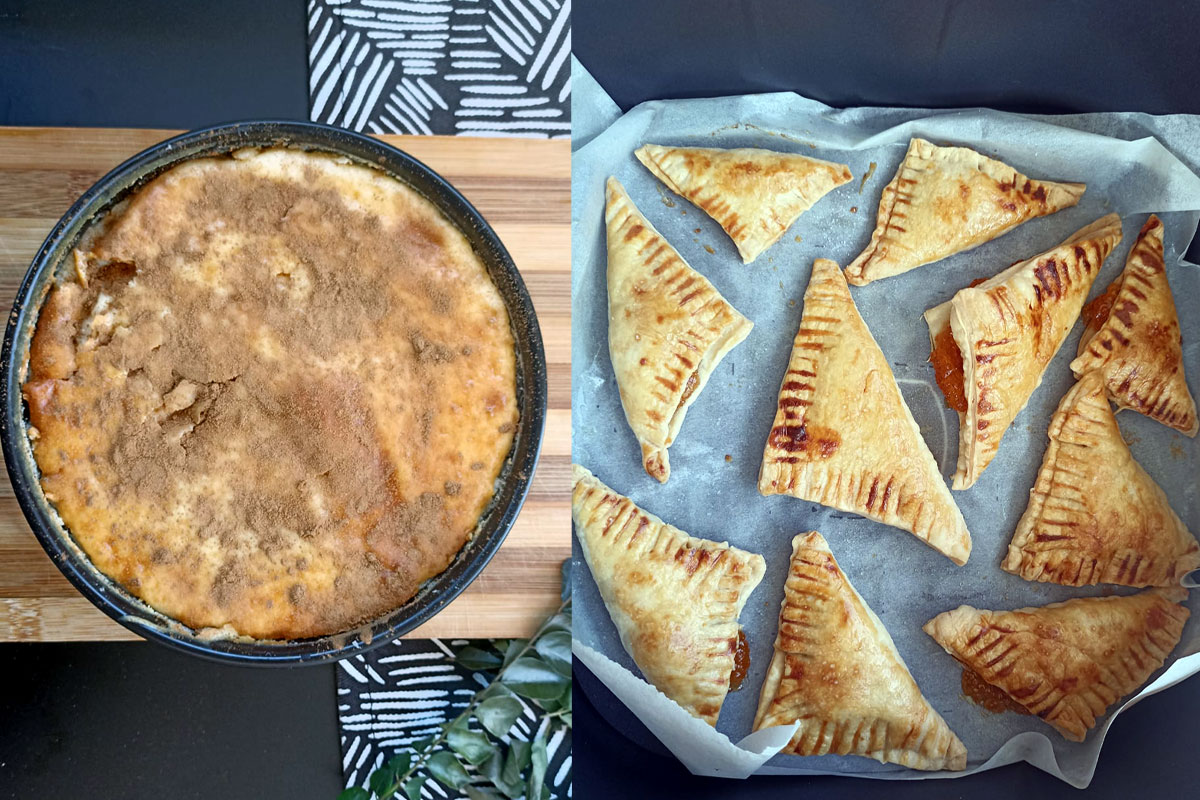
I will say that baking in the air-fryer made me feel like a child playing with an Easy Bake Oven, and I'm not sure whether I love or hate that feeling… But that’s something I’ll dissect in therapy.
ALSO READ: How my quest to make the perfect masala chai reconnected me to my heritage
The grand finale
I ended off with a bang. I made Abigail Donnelly’s air-fryer roast chicken with all the trimmings. It was amazing! The chicken was crispy on the outside and succulent on the inside. The crispy onions were a game-changer. I will make it often to add to salads, eggs (done on the stove), sandwiches… the possibilities are endless. The cauliflower was perfectly cooked, which was a relief because I had not made veggies in the air-fryer since the butternut incident. While I was super-happy with how this meal turned out, I was impressed by Abi and her incredible recipe – not the air-fryer.
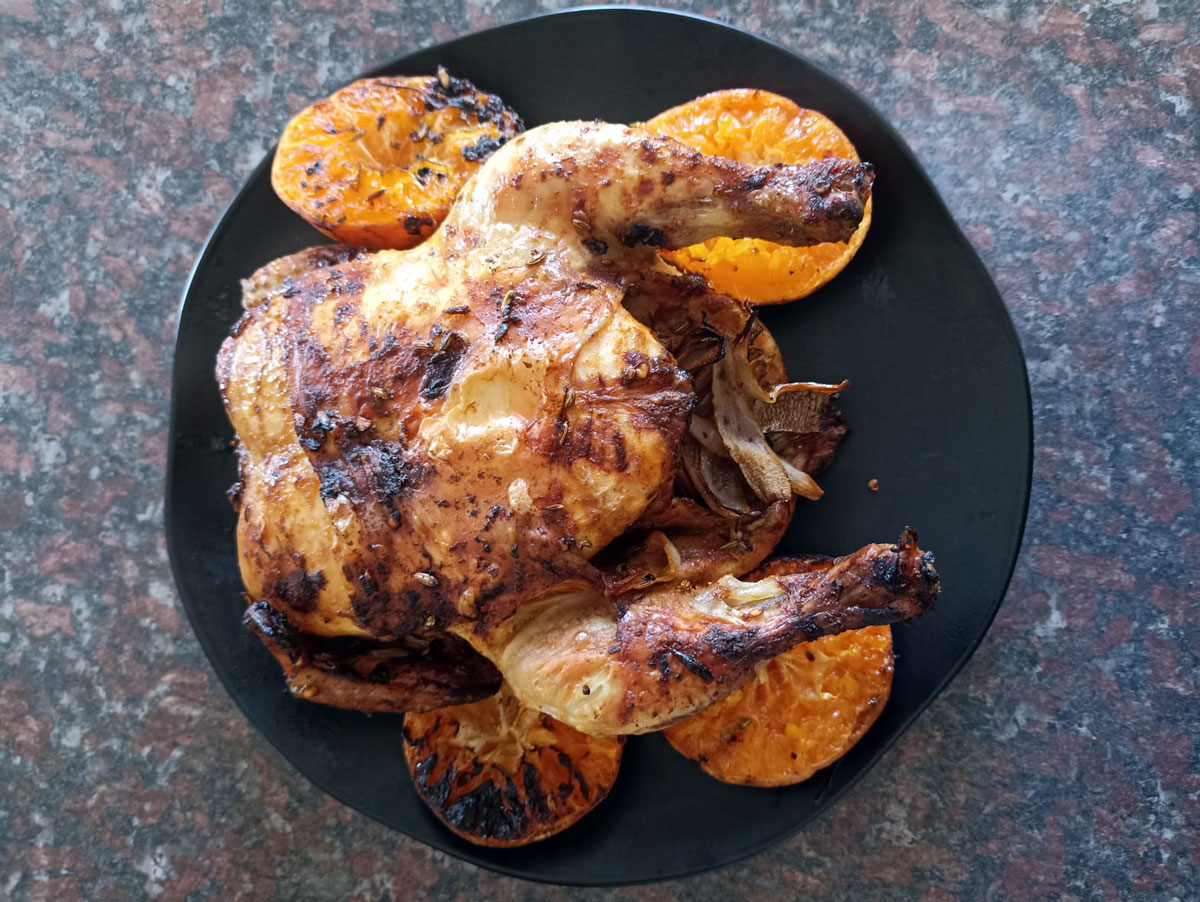
Find the recipe for Abi's air-fryer roast chicken here.
Final thoughts on the air-fryer
I'll admit that I had a distinct bias against air-fryers going into this. But I also took the time to thoroughly use all its features and make multiple things over months before coming to a conclusion. I am a journalist, these things must be done properly. After air-frying, roasting, reheating and baking, I can say this with absolute certainty, I was right. Air-fryers are just countertop ovens.
They may be (slightly) faster than ovens, but they are smaller and cook less food, so that’s expected. I will admit that reheating things like chips and fried chicken is great, much better than the microwave. But I barely make these things and I never have leftover takeaways (don’t judge me). My life is not better because of an air-fryer. In fact, it’s noisier. The appliance really is so loud. I don’t regret getting it, because it‘s better for me economically. But I will not spread the gospel of the air-fryer. It’s not a miracle. It’s just an appliance.


Wahaha! Hilarious article!
We recently acquired an air fryer as a gift and yip I’ve also been somewhat puzzled by the hype on every corner. But if nothing else, with our perpetually electrifying pricing challenges, that alone makes it a good option. So thanks for the flop warnings, looking forward to trying some recipes!
I don’t understand the total hype of air fryers … never wanted one. BUT our friends had a Sunbeam 14 liter convenction (halogen) oven. I’m extremely fussy about cluttered countertops – so I just thought – no way, there’s no space for a Sunbeam.
The next night I heated our normal oven to 200 oC – it took about 15 minutes. Then I put (don’t laugh!) 3 average sized battered frozen haddock fillets into the oven – for 20 minutes. It was fabulous – but the oven stayed hot for probably another 30-60 minutes! We looked at the prices for Sunbeam convection oven – R900 for 14 liter – (vs R1500 for a 4 (yes 4!) liter air fryer). Bought a Sunbeam.
I can HONESTLY say – it has changed my life!!!!!! I’ve made frozen fish fillets in it – yes, it took me 25 minutes (5 minutes longer than it would have in the normal oven) BUT BUT BUT …. that included the preheat time … and it takes A LOT LESS electricity!!!!!!
Steaming veg or rice in this Sunbeam is tricky – I’ve decided I’ll just do that in my microwave. Hard-boiled eggs? A breeze in the Sunbeam convection oven!!! (Normally I would boil water in the kettle – then place small pot on our solid plate stove, add the boiling water – and still had to wait at least 5 min for it to boil. Then add the eggs and boil it for 10 minutes!!!!) In the Sunbeam convection oven, on the high tray you place the raw eggs in their shells – just like that on the tray (in the grooves) – 15 min at 200 oC. Remove with tongs, place in cold water. EASY AS PIE!!!!!!!!
Pizza took me a few tries – I used the bottom of a round loose-bottom tin – sprayed it, placed dough on top – onto the high tray. But the pizza was very oily. Next I floured the bottom of the tin, but the bottom was still soggy. Now I take the ball of dough, flour it well on the outside – flatten it onto a FLOURED dinner plate – and place it directly onto the HIGH tray. With toppings. 25 minutes at 200 oC. (Yes, I have 2 make 2 medium sized pizzas … but it’s still worth it!)
Granola (muesli) in oven – I used to preheat oven to 160 oC – sprayed a baking sheet – spoon the oats-seeds-syrup-oil mixture on top – and bake it for 30 minutes (with a stir after 15 minutes.) Yesterday I took my 2 loose-bottom cake tins. Sprayed them. Divided the mixture between the 2 tins – one tin at a time – on high tray – 225oC – 7 minutes, stir, 5 minutes. Remove, placed other tin in. Repeat the baking. Let mixture cool in both tins. IT WAS AMAZING! Saved so much electricity!!!!
Easy to clean – affordable to buy – big size – necessity in kitchen!
The way I appreciate the honesty of this piece.
Thank you! I have (for the longest time) felt a deep sense of FOMO! Finally, I can sleep easy about missing out on my Black Friday ‘Air-Fryer’ special.